


Many of us, whether you rent or own a home, find ourselves with special photos sitting in our phones or computers – moments that deserve more than just a quick scroll or occasional glance. Converting photos to canvas elevates digital memories into tangible artwork that adds warmth and personality to any home.
After years of helping homeowners transform their favorite snapshots into stunning wall displays, experienced decorators have learned that the right techniques make all the difference between an ordinary print and a breathtaking canvas that becomes a focal point in the home.
Preparing Your Digital Photos for Canvas Success
When looking to convert photos to canvas the most common challenge for many of us arises when canvas prints arrive looking blurry or sadly off-color. Not every digital photo is automatically ready for the big leap to canvas. Fortunately, a few simple adjustments can make a world of difference. DSCENE magazine editors investigate in conversations with our contributing photographers and art directors, putting together a list of best canvas to photos tips:
Optimal Resolution Requirements for Canvas Printing
For canvas prints that look crisp and professional, resolution matters significantly. This lesson often comes the hard way when trying to enlarge a low-resolution social media photo for wall display.
For best results:
- Aim for at least 150 PPI (pixels per inch) at the desired print size
- For an 8×10 canvas, the image should be at least 1200×1500 pixels
- For larger prints (16×20 or bigger), try to use images that are 2400×3000 pixels or higher
If a photo falls short, consider using a smaller canvas size or choosing a different image. Anyone can check an image’s resolution by right-clicking the file and selecting “Properties” (Windows) or “Get Info” (Mac).
Color Correction and Enhancement Techniques
Even great photos sometimes need a little help with color before they hit canvas. These simple adjustments work wonders:
- Increase vibrance slightly (not saturation) to make colors pop without looking unnatural
- Adjust white balance if the photo has a color cast (too yellow, blue, etc.)
- Boost shadows slightly to prevent dark areas from losing detail on canvas
- Check screen brightness – edit at normal brightness to avoid prints that look too dark
Most phones have basic editing tools built right in, or people can use free programs like Google Photos or GIMP for more control.
Cropping and Composition Guidelines for Canvas Format
Canvas prints typically have wrapped edges where the image continues around the sides. This means some of the edges of the photo will be lost, which can accidentally cut off important elements.
When cropping:
- Leave extra space around key subjects (about 1.5-2 inches from each edge)
- Consider the canvas depth (typically 0.75-1.5 inches) when planning composition
- Use the rule of thirds to position important elements away from edges
- For portraits, never crop at joints (knees, elbows, wrists) – it looks awkward on canvas
Choosing the Right Canvas Style for Your Space
The canvas style chosen can completely change how a photo displays in the home. From minimalist apartments to rustic farmhouses, the right canvas style makes all the difference.
Traditional Wrapped vs. Modern Floating Frames
Traditional wrapped canvas has a classic, gallery-like appearance where the image wraps around the edges. It’s perfect for:
- Clean, contemporary spaces
- Photos with ample room around the edges
- Creating a cohesive gallery wall
Floating frames, where the canvas appears to “float” within a frame, add a more sophisticated, finished look. They work beautifully in:
- More formal spaces like dining rooms or offices
- Traditional or transitional decor styles
- Spaces where a bit more visual weight is desired
Many homeowners incorporate both styles – wrapped canvases in casual family rooms and floating frames in more formal living spaces.
Single Panel vs. Multi-Panel Arrangements
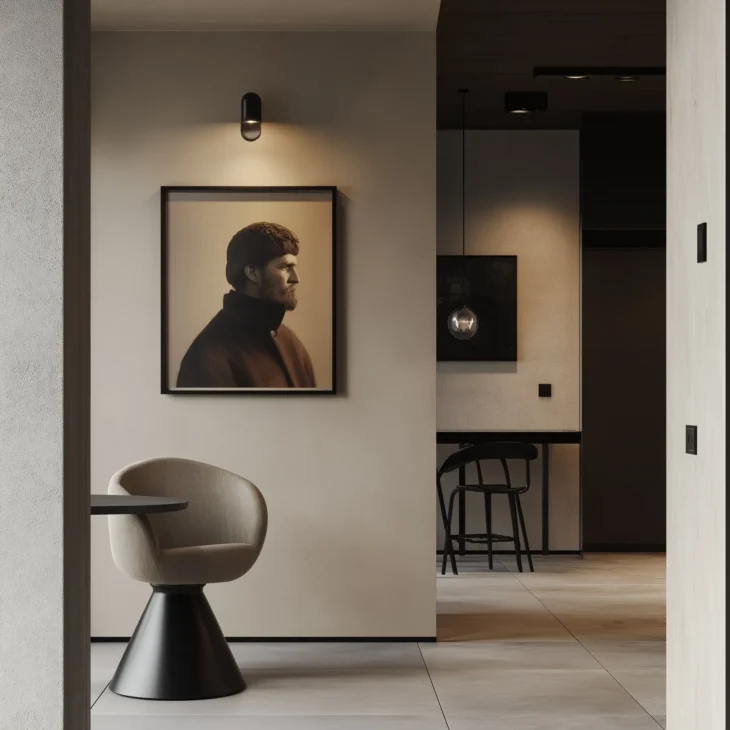
Single large canvases make bold statements and work well for:
- Dramatic landscapes or portraits
- Focal points above sofas, beds, or fireplaces
- Simpler rooms where one standout piece is desired
Multi-panel arrangements (diptychs, triptychs, or grid layouts) offer versatility for:
- Telling a story across multiple images
- Filling large wall spaces
- Creating more visual interest in a space
When decorating a long hallway, a series of five smaller canvases rather than one large one creates a natural flow that draws visitors through the space. The same can also come into mix with a carefully chosen wallpaper, also favoured by fashion brands entering the home design arena.
Size Selection Based on Wall Space and Room Dimensions
Getting the scale right can be tricky, but these guidelines help:
- For areas above furniture, choose a canvas that’s about 2/3 to 3/4 the width of the furniture
- Leave at least 6-8 inches of wall space around the canvas
- In smaller rooms, opt for fewer, more impactful pieces rather than many small ones
- For high ceilings, choose taller canvases to draw the eye upward
Professional designers suggest: when in doubt, go bigger than you think. Most people choose canvases that are too small for their space.
Professional Editing Techniques for Canvas-Ready Images
Taking photos from good to great requires a bit more than basic edits. These pro-level adjustments help canvas prints look like they belong in a gallery.
Adjusting Contrast and Saturation for Canvas
Canvas has different properties than glossy photo paper or screens, so adjustments that look great on a phone might not translate well:
- Increase contrast slightly more than seems necessary on screen (canvas tends to flatten contrast)
- Use a light hand with saturation – about 10-15% is usually enough
- Consider the S-curve adjustment in editing apps to add depth without making the image look artificial
- Check black levels – true blacks may lose detail on canvas, so lighten very dark areas slightly
Many homeowners find that adding just a touch more contrast than looks good on screen results in a much more vibrant canvas.
Sharpening and Noise Reduction Methods
Canvas texture can both hide and emphasize different aspects of a photo:
- Apply a light sharpening pass focused on edges rather than overall sharpening
- Use noise reduction selectively on areas like skies and shadows
- Over-sharpen faces slightly as canvas will naturally soften them
- Avoid heavy filters that might look dated in a few years
It’s particularly important to be careful with portrait sharpening – details in eyes and hair are desirable, but not skin texture.
Creating Depth and Texture Effects
Canvas has natural texture, but photos can be enhanced to work with this quality:
- Add a very subtle vignette (darkening around edges) to create depth
- For landscapes, enhance texture in elements like clouds, water, or foliage
- Consider subtle HDR effects for architectural or landscape images
- For black and white photos, increase structure or clarity slightly to enhance the canvas texture
These subtle adjustments aren’t always noticeable individually, but together they create a much more professional final product.
Strategic Photo Display Solutions
One of the advantages of Mixtiles canvas options is their flexibility for different spaces. Their approach solves many common canvas display problems.
Custom Canvas Arrangements for Different Room Types
Each room has different needs when it comes to canvas displays:
- Living rooms: Larger statement pieces or themed collections that reflect personality
- Bedrooms: Calming, personal images that create a restful atmosphere
- Kitchens: Food photography, family gatherings, or colorful still life that can withstand humidity
- Home offices: Inspiring landscapes or motivational imagery that enhances focus
When redesigning a home office during the pandemic, selecting three canvases of aspirational travel destinations creates an inspiring view during long workdays.
Mixing Canvas Prints with Other Wall Art
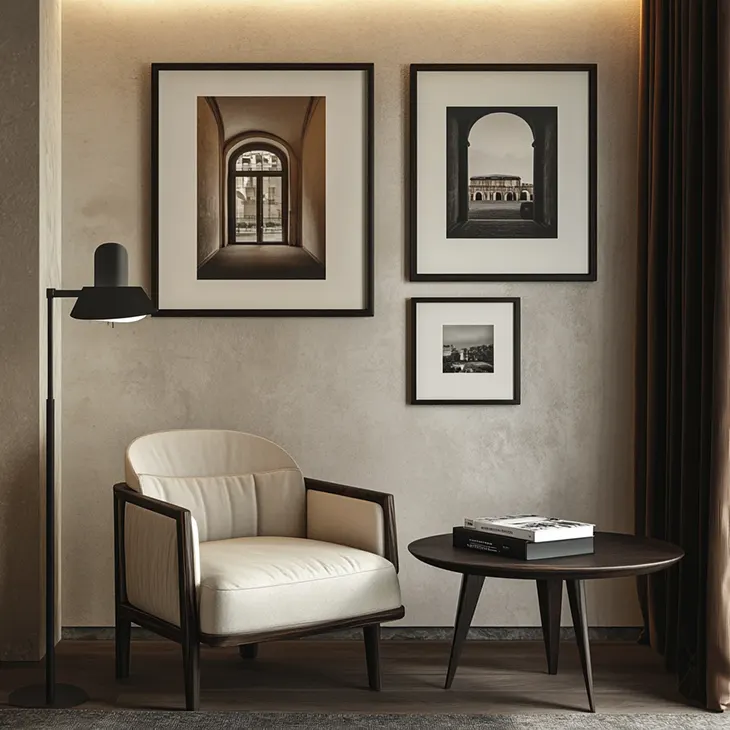
Canvas prints don’t have to stand alone. Creating dimension by mixing:
- Canvas with framed prints for textural contrast
- Different sizes to create visual rhythm
- Canvas photos with other elements like mirrors, clocks, or wall sculptures
- Consistent color themes across different mediums
In dining rooms, pairing a large canvas landscape with smaller framed botanical prints and a decorative mirror, all sharing a similar color palette, creates visual interest.
Easy Installation Without Wall Damage
The no-damage installation options from Mixtiles solve a major headache for renters or anyone who hates putting holes in walls:
- Plan arrangements by laying them out on the floor first
- Use painter’s tape to mark positions before installing
- Consider templates made from kraft paper to visualize placement
- Take advantage of damage-free hanging systems that don’t require nails or screws
For apartment dwellers, being able to take all canvas prints when moving without leaving a single mark on the walls is a huge relief when it comes to security deposits.
Creating Cohesive Photo Collections
Individual photos can be beautiful, but thoughtfully curated collections tell a complete story and make a much stronger visual impact.
Curating Photos by Theme or Color Palette
The most striking canvas collections share visual connections:
- Travel collections from a single destination
- Color-coordinated images (all black and white, or all sharing 2-3 dominant colors)
- Seasonal imagery that creates a cohesive mood
- Subject-based collections (architectural details, natural elements, family portraits)
For anniversary gifts, creating a timeline of family photos spanning decades, all converted to black and white, provides a timeless, cohesive look.
Spacing and Layout Guidelines
Proper spacing creates a polished, intentional look:
- Keep 2-3 inches between canvases in a grouping
- Align canvases along at least one edge (top, bottom, or sides)
- For grid layouts, maintain perfectly equal spacing
- Consider the viewing distance – larger spaces need more generous spacing
Using paper templates or painter’s tape to mark spacing before hanging saves frustration and prevents unnecessary wall holes.
Seasonal Rotation Strategies
Canvas collections don’t have to be permanent:
- Create seasonal photo collections to swap throughout the year
- Use consistent sizes to make rotation simple
- Store unused canvases flat, covered with acid-free paper
- Consider a “feature wall” where images are regularly updated
Many homeowners feature a rotating canvas collection in their entryway – family beach photos in summer, fall foliage in autumn, and cozy indoor scenes in winter.
Advanced Canvas Art Preservation
Quality canvas prints should last for decades, but proper care makes a big difference in their longevity.
Environmental Factors and Placement Tips
Where a canvas is hung affects how well it ages:
- Avoid direct sunlight, which can fade images over time
- Keep canvases away from humidity sources like bathrooms and kitchens
- Maintain stable room temperatures – extreme fluctuations can cause canvas to warp
- Consider glass-front canvas options for particularly valuable images in challenging environments
This lesson often comes the hard way after hanging a beautiful canvas in a bathroom – the humidity can cause the frame to warp within months.
Cleaning and Maintenance Best Practices
Proper cleaning keeps canvas looking fresh:
- Dust lightly with a soft, dry microfiber cloth
- For stubborn dust, use a soft brush attachment on low vacuum power
- Never use liquid cleaners directly on canvas
- Handle canvases by the edges or back to avoid oils from fingers
A gentle dusting every month or so keeps canvases looking like new, even years after printing.
UV Protection and Longevity Measures
Extra protection measures for valuable or sentimental images:
- Choose companies that offer UV-resistant inks and coatings
- Consider acrylic glazing for extra protection in bright rooms
- Apply a canvas-specific protective spray for additional defense (though professional application is best)
- Keep important documentation about the print for insurance purposes
For wedding photos on canvas, investing in premium UV-resistant options helps maintain color for decades.
Modern Canvas Innovation
The canvas printing world has come a long way from the early days of photo-to-canvas conversion, with new technologies making display easier and more flexible. Today accent walls are a truly shaping the sentiment of the interior space, and a photo wall is the perfect solution.
Smart Design Features for Contemporary Homes
Today’s canvas options offer features designed for modern living:
- Ultra-slim profiles that create less shadow and work in smaller spaces
- Lightweight materials that put less stress on walls
- Glare-resistant finishes for rooms with lots of windows
- Edge options that complement rather than compete with the image
The slim profile options work particularly well for narrow hallways, where traditional deep canvases would feel too bulky.
Damage-Free Installation Technology
Mixtiles’ approach to hanging solves common frustrations:
- Adhesive systems that leave no residue
- Repositionable hangers that allow for easy rearrangement
- Level-free installation that ensures straight hanging
- Systems designed for different wall surfaces from drywall to concrete
Being able to adjust canvas arrangements without making new holes is a game-changer for those who like to refresh their space regularly.
Customization Options for Personal Style
Beyond the photo itself, customization options add personal flair:
- Edge color choices that complement home decor
- Texture variations from smooth modern to traditional canvas weave
- Finish options from matte to semi-gloss
- Special effects like black and white with color accents
When creating a canvas from a vintage family photo, sepia-toned finishes and traditional canvas textures can enhance the historical feel perfectly.
Converting digital photos to canvas creates a bridge between digital lives and physical spaces, transforming fleeting moments into lasting art that tells a unique story. With these techniques, canvas prints won’t just be photos on the wall – they’ll be conversation pieces, memory keepers, and design elements that make a house feel truly like home.

